Security Scanning in DevoxxGenie: Let the Agent Find and Fix Vulnerabilities

Security issues rarely announce themselves. Hardcoded API keys, injection vulnerabilities and outdated dependencies sit quietly in your codebase until someone finds them — ideally you, before anyone else does.
With v0.9.17, DevoxxGenie integrates three best-in-class open-source security scanners directly as LLM agent tools. Your AI assistant can now scan your project on demand, interpret the results in context, explain each finding, suggest remediations, and automatically create prioritised backlog tasks — all from a single prompt.
Three Scanners, One Agent
DevoxxGenie adds support for three complementary scanners that together cover the most common security risk categories:
| Scanner | Category | What it finds |
|---|---|---|
| Gitleaks | Secret detection | Hardcoded API keys, passwords, tokens and credentials in source code |
| OpenGrep | SAST | Injection flaws, insecure patterns, XSS, unsafe crypto and more |
| Trivy | SCA / CVE | Known vulnerabilities in Maven, Gradle, npm, pip, Cargo and Go dependencies |
Each scanner runs as a native binary on your machine — DevoxxGenie does not bundle or auto-download them, and nothing is sent to a remote service. Install them once via Homebrew (or your package manager of choice) and they're ready to go:
brew install gitleaks opengrep trivy
Scanning as an Agent Tool
When Agent Mode is active and Security Scanning is enabled, the LLM gains four new tools:
run_gitleaks_scan— detect hardcoded secretsrun_opengrep_scan— SAST code security analysisrun_trivy_scan— SCA dependency vulnerability scanrun_security_scan— run all enabled scanners at once
You don't need to remember tool names. Just ask in plain language:
"Run a full security scan on this project and tell me what you find."
"Check my dependencies for known CVEs."
"Scan for hardcoded secrets and create backlog tasks for everything you find."
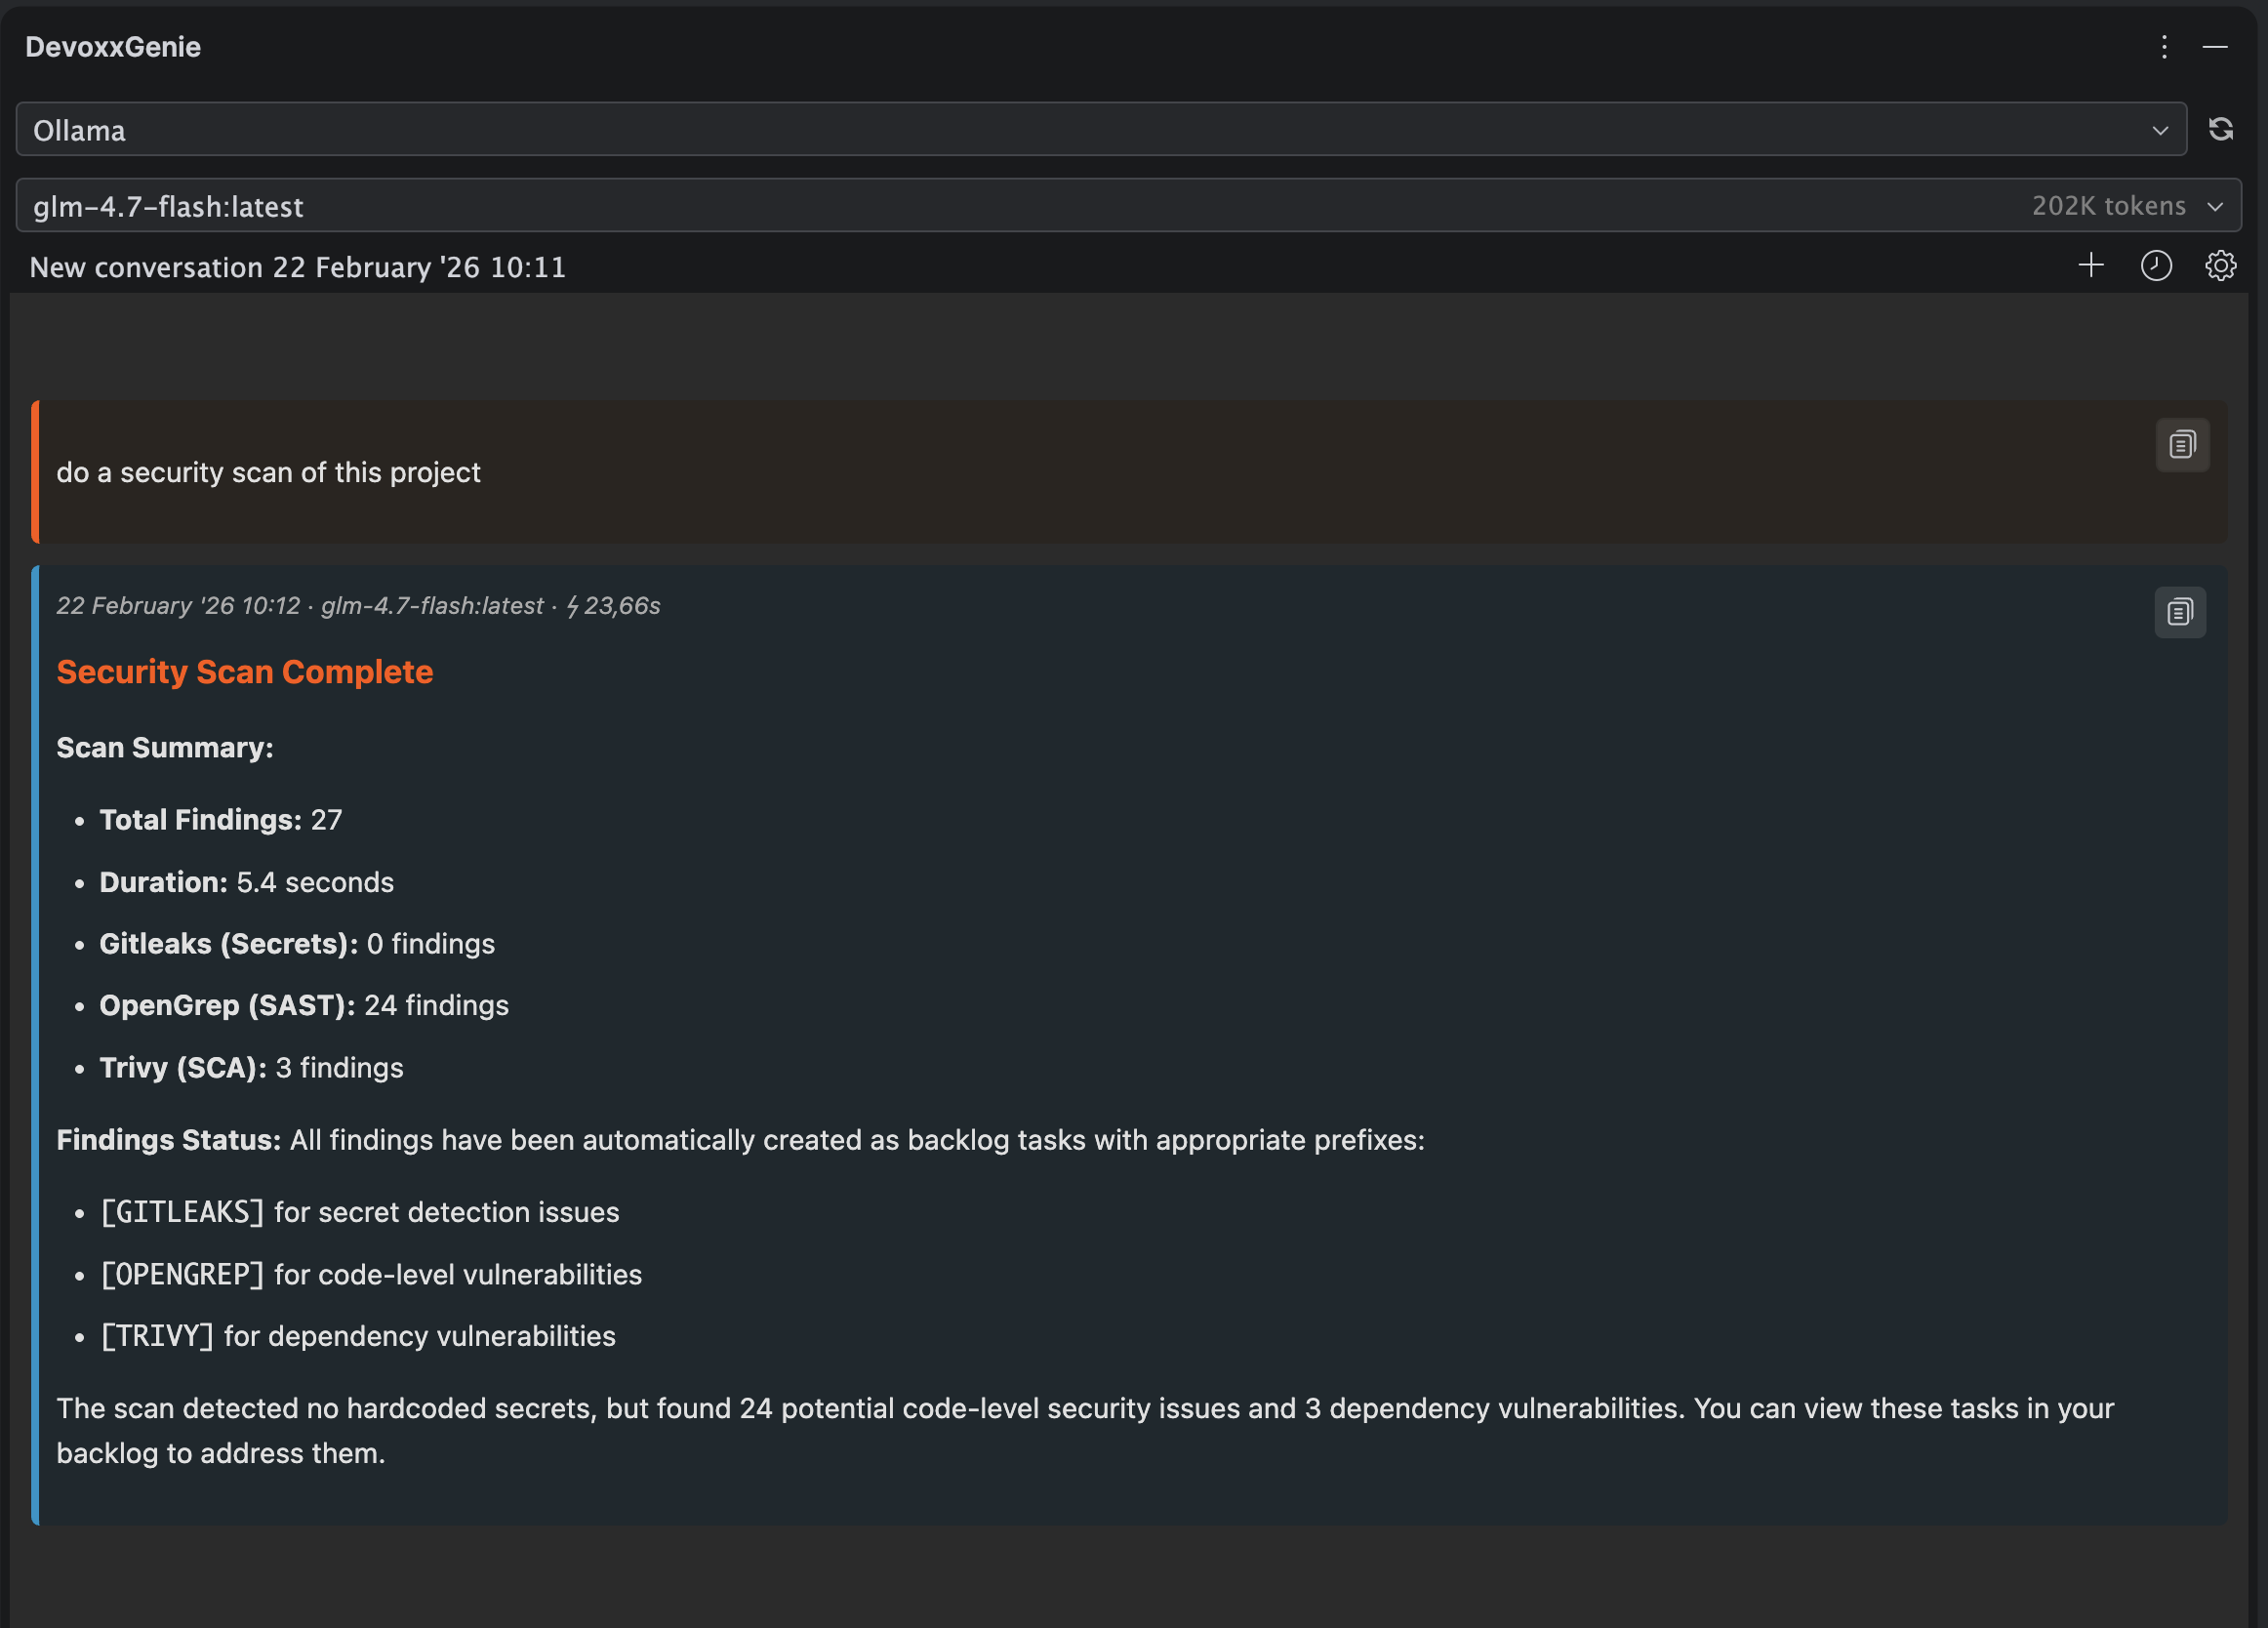
The agent invokes the scanner, reads the JSON output, and gives you a human-readable summary — with context about why each finding matters and how to fix it. Because the LLM sees your code alongside the findings, it can point you directly to the problematic line and suggest a concrete remediation.
From Finding to Backlog Task in One Step
Security scan results are only useful if they get acted on. DevoxxGenie bridges the gap between finding and fixing with automatic Spec Browser task creation.
When Create Spec Tasks from findings is enabled, every finding is saved as a structured Backlog.md task:
- Title prefixed with
[GITLEAKS],[OPENGREP]or[TRIVY]for easy filtering - Priority mapped from the scanner's severity (
high,medium,low) - Labels
security, scanner name and severity level - Description with rule ID, affected file/package and remediation guidance

Re-running a scan won't flood your backlog — duplicate findings (matched by title) are skipped automatically.
Once the tasks are in the Spec Browser you can use the Agent Loop to implement remediations autonomously: select the security tasks, click Run All To Do, and let the agent work through them one by one.
Settings
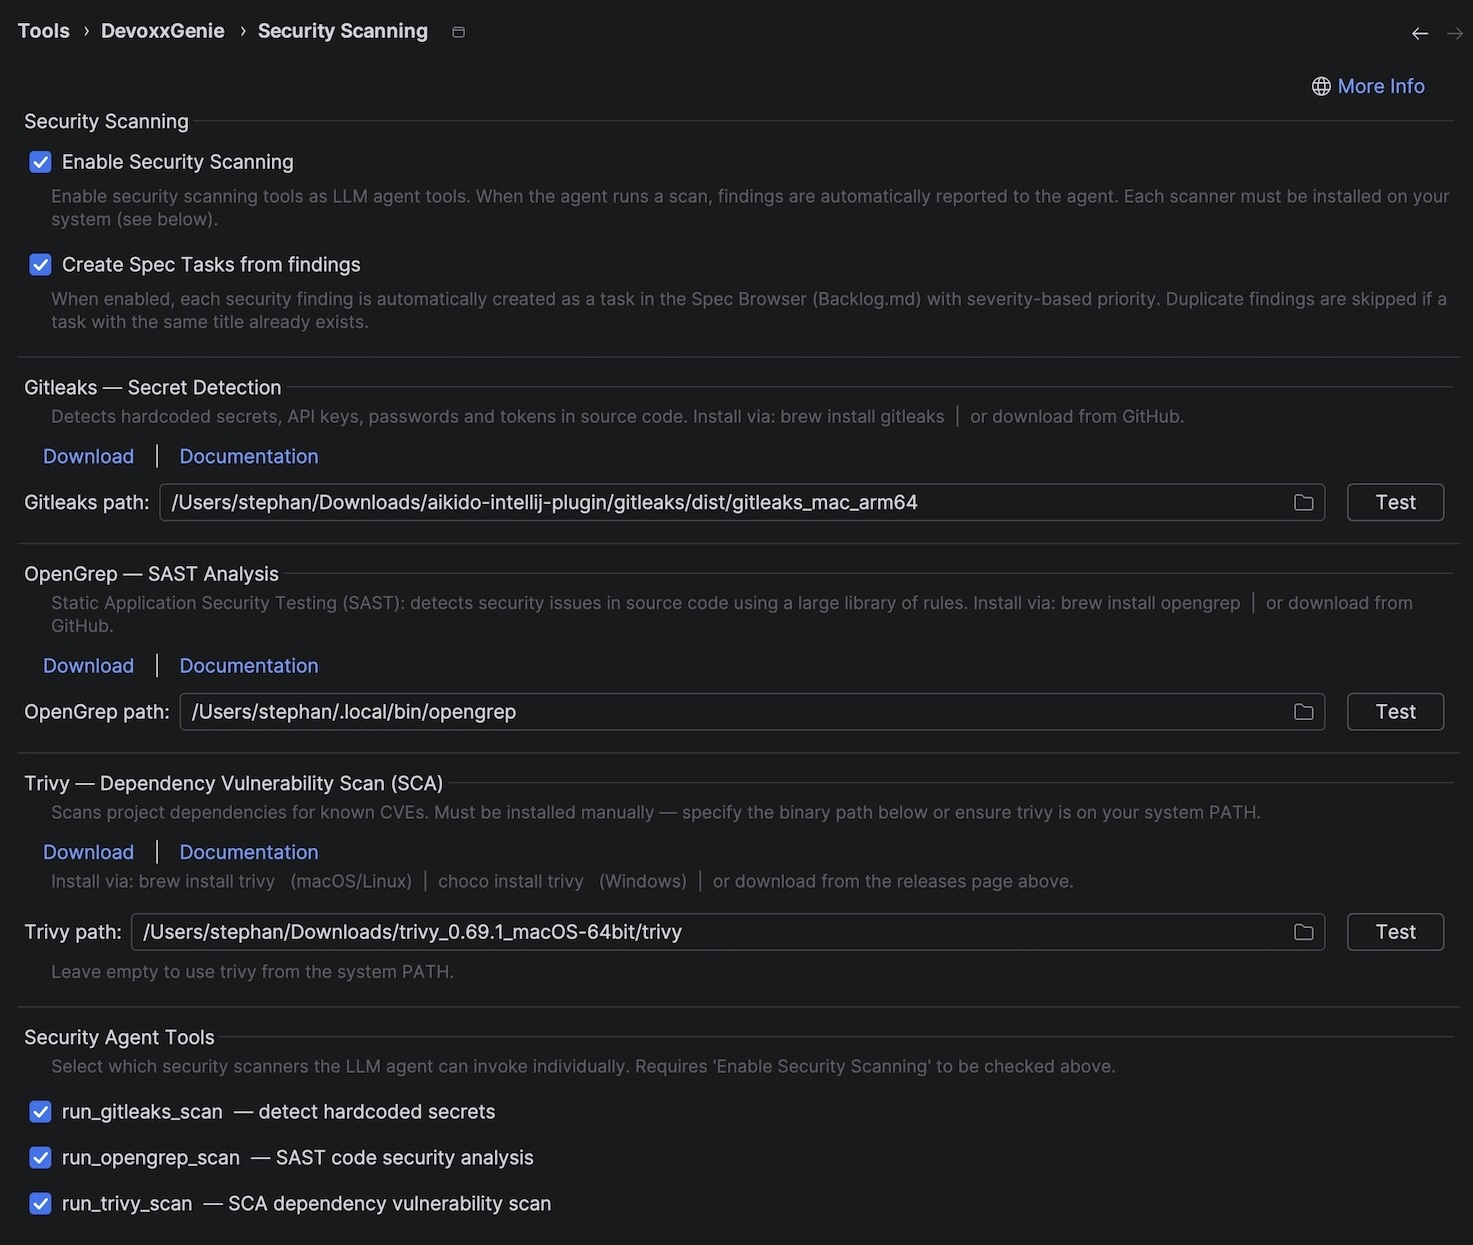
Everything is configured under Settings → DevoxxGenie → Security Scanning:
- Enable Security Scanning — master toggle for all agent tools
- Create Spec Tasks from findings — gate automatic task creation
- Per-scanner sections — each with a file browser to locate the binary, a Test button that verifies the binary is reachable and prints its version, and install links
The Test button runs the binary version command on a background thread and shows ✓ with the version string if the binary is found and working, or ✗ with the error message if something is wrong — no guessing required.
You can also control which individual tools the agent can call under Security Agent Tools, allowing you to enable only the scanners relevant to your project.
Get Started
- Install the scanners:
brew install gitleaks opengrep trivy - Open Settings → DevoxxGenie → Security Scanning
- Click Test next to each scanner to verify the setup
- Enable Security Scanning and optionally Create Spec Tasks from findings
- Start a conversation in Agent Mode and ask: "Run a security scan on this project"
Full documentation is available at genie.devoxx.com/docs/features/security-scanning.
Security scanning is available from DevoxxGenie v0.9.17, free as always on the JetBrains Marketplace.