Security Scanning
DevoxxGenie integrates three best-in-class open-source security scanners as LLM agent tools. When your AI assistant is running in Agent Mode, it can invoke these scanners on demand, interpret the results in context, and — optionally — create prioritised backlog tasks from every finding.
Supported Scanners
| Scanner | What it detects | Install |
|---|---|---|
| Gitleaks | Hardcoded secrets, API keys, tokens and passwords in source code and git history | brew install gitleaks |
| OpenGrep | SAST (Static Application Security Testing) issues — injection flaws, insecure patterns, misconfigurations | brew install opengrep |
| Trivy | SCA (Software Composition Analysis) — known CVEs in project dependencies | brew install trivy |
Each scanner must be installed on your system. DevoxxGenie does not bundle or auto-download the binaries.
How It Works
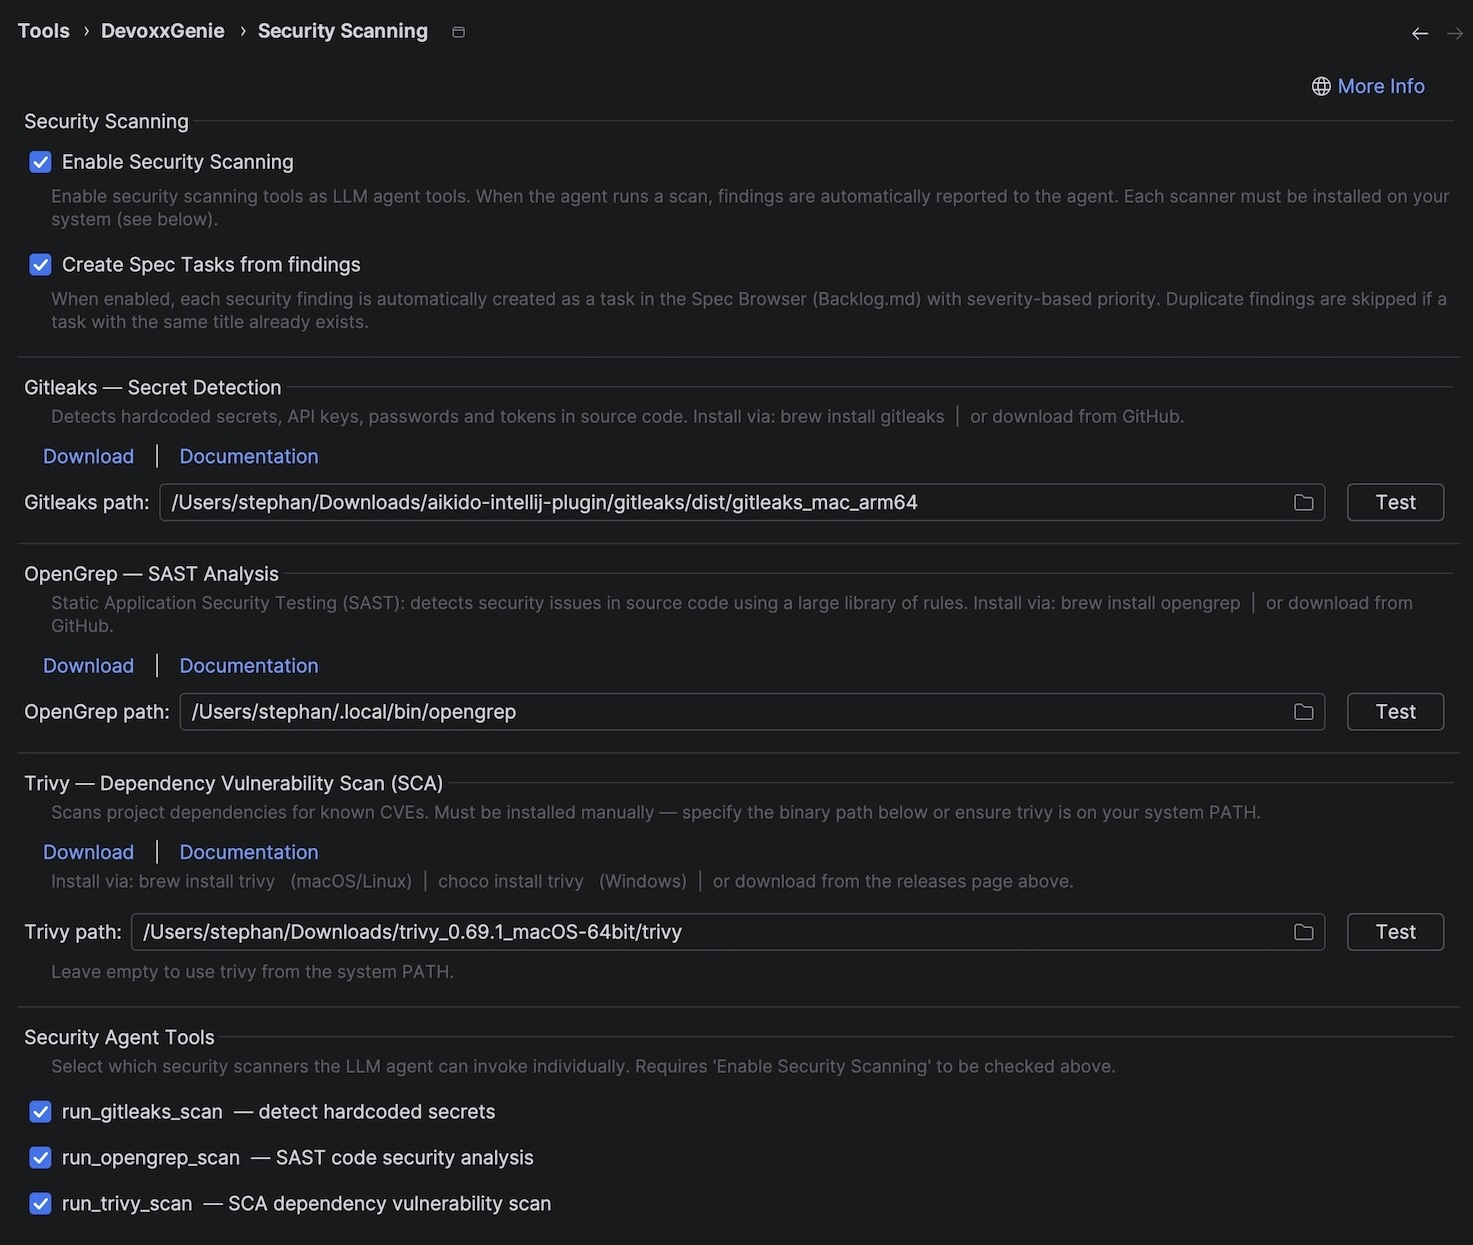
- You enable security scanning and configure the binary paths in Settings → Security Scanning.
- The scanners are exposed to the LLM as agent tools (
run_gitleaks_scan,run_opengrep_scan,run_trivy_scan). - During an agent session the LLM decides when to run a scan — or you can ask it explicitly: "Run a security scan on this project".
- Results are returned to the LLM as a structured summary. The agent can explain findings, suggest remediations and answer follow-up questions.
- Optionally, each finding is automatically created as a task in your Spec Browser (Backlog.md) with a severity-based priority, ready for tracking and remediation.
Settings
Open Settings / Preferences → DevoxxGenie → Security Scanning.
General
| Setting | Description |
|---|---|
| Enable Security Scanning | Master switch. When off, no security agent tools are registered, regardless of individual scanner settings. |
| Create Spec Tasks from findings | When enabled, each finding from a scan is automatically created as a task in the Spec Browser (Backlog.md). Duplicate findings (same title) are skipped. |
Per-Scanner Configuration
Each scanner has its own section with:
- Binary path — leave blank to auto-detect from system
PATH, or click the browse button (📁) to select the executable manually. - Test button — verifies the binary is reachable and prints its version. A green ✓ means the scanner is ready; a red ✗ shows the error so you can diagnose installation issues.
- Download / Documentation links — quick access to the scanner's release page and documentation.
Security Agent Tools
Select which scanners the LLM agent can invoke individually. All three are enabled by default. Uncheck a scanner to prevent the agent from running it, even if the binary is installed.
The Enable Security Scanning master switch must be checked for any agent tools to be active.
Installation Guide
Gitleaks
Gitleaks detects hardcoded secrets such as API keys, passwords and tokens by matching against a library of regular-expression rules.
# macOS / Linux
brew install gitleaks

# Windows (Chocolatey)
choco install gitleaks

# Or download the binary directly
# https://github.com/gitleaks/gitleaks/releases
After installing, the binary is typically available on your system PATH as gitleaks. Leave the path field blank in Settings to use it from PATH, or enter the full path if you installed it in a custom location.
OpenGrep
OpenGrep performs SAST analysis using a large, maintained rule set that covers injection vulnerabilities, insecure cryptography, hard-coded credentials patterns and more.
# macOS / Linux
brew install opengrep

# Or download the binary directly
# https://github.com/opengrep/opengrep/releases
OpenGrep ships as two binaries: opengrep-cli (the main binary) and pyopengrep (its Python engine). Both must be present and accessible. If you install via brew, both are placed in the same directory automatically.
When you enter a custom path, point to opengrep-cli. DevoxxGenie will ensure pyopengrep can be found alongside it.
Trivy
Trivy scans your project's dependency manifests (Maven, Gradle, npm, pip, Cargo, Go modules, etc.) against the NVD and OS advisory databases for known CVEs.
# macOS / Linux
brew install trivy

# Windows (Chocolatey)
choco install trivy

# Or download the binary directly
# https://github.com/aquasecurity/trivy/releases
Leave the Trivy path field blank to resolve trivy from your system PATH.
Agent Tool Reference
When Security Scanning is enabled, the following tools become available to the LLM agent:
| Tool | Description |
|---|---|
run_gitleaks_scan | Runs Gitleaks on the project root and returns a summary of secrets found |
run_opengrep_scan | Runs OpenGrep SAST analysis and returns a summary of code-level security issues |
run_trivy_scan | Runs Trivy SCA and returns a summary of vulnerable dependencies |
You can ask the agent to use them with natural language:
- "Scan this project for hardcoded secrets."
- "Run a SAST analysis and tell me the top 5 issues."
- "Check my dependencies for known CVEs."
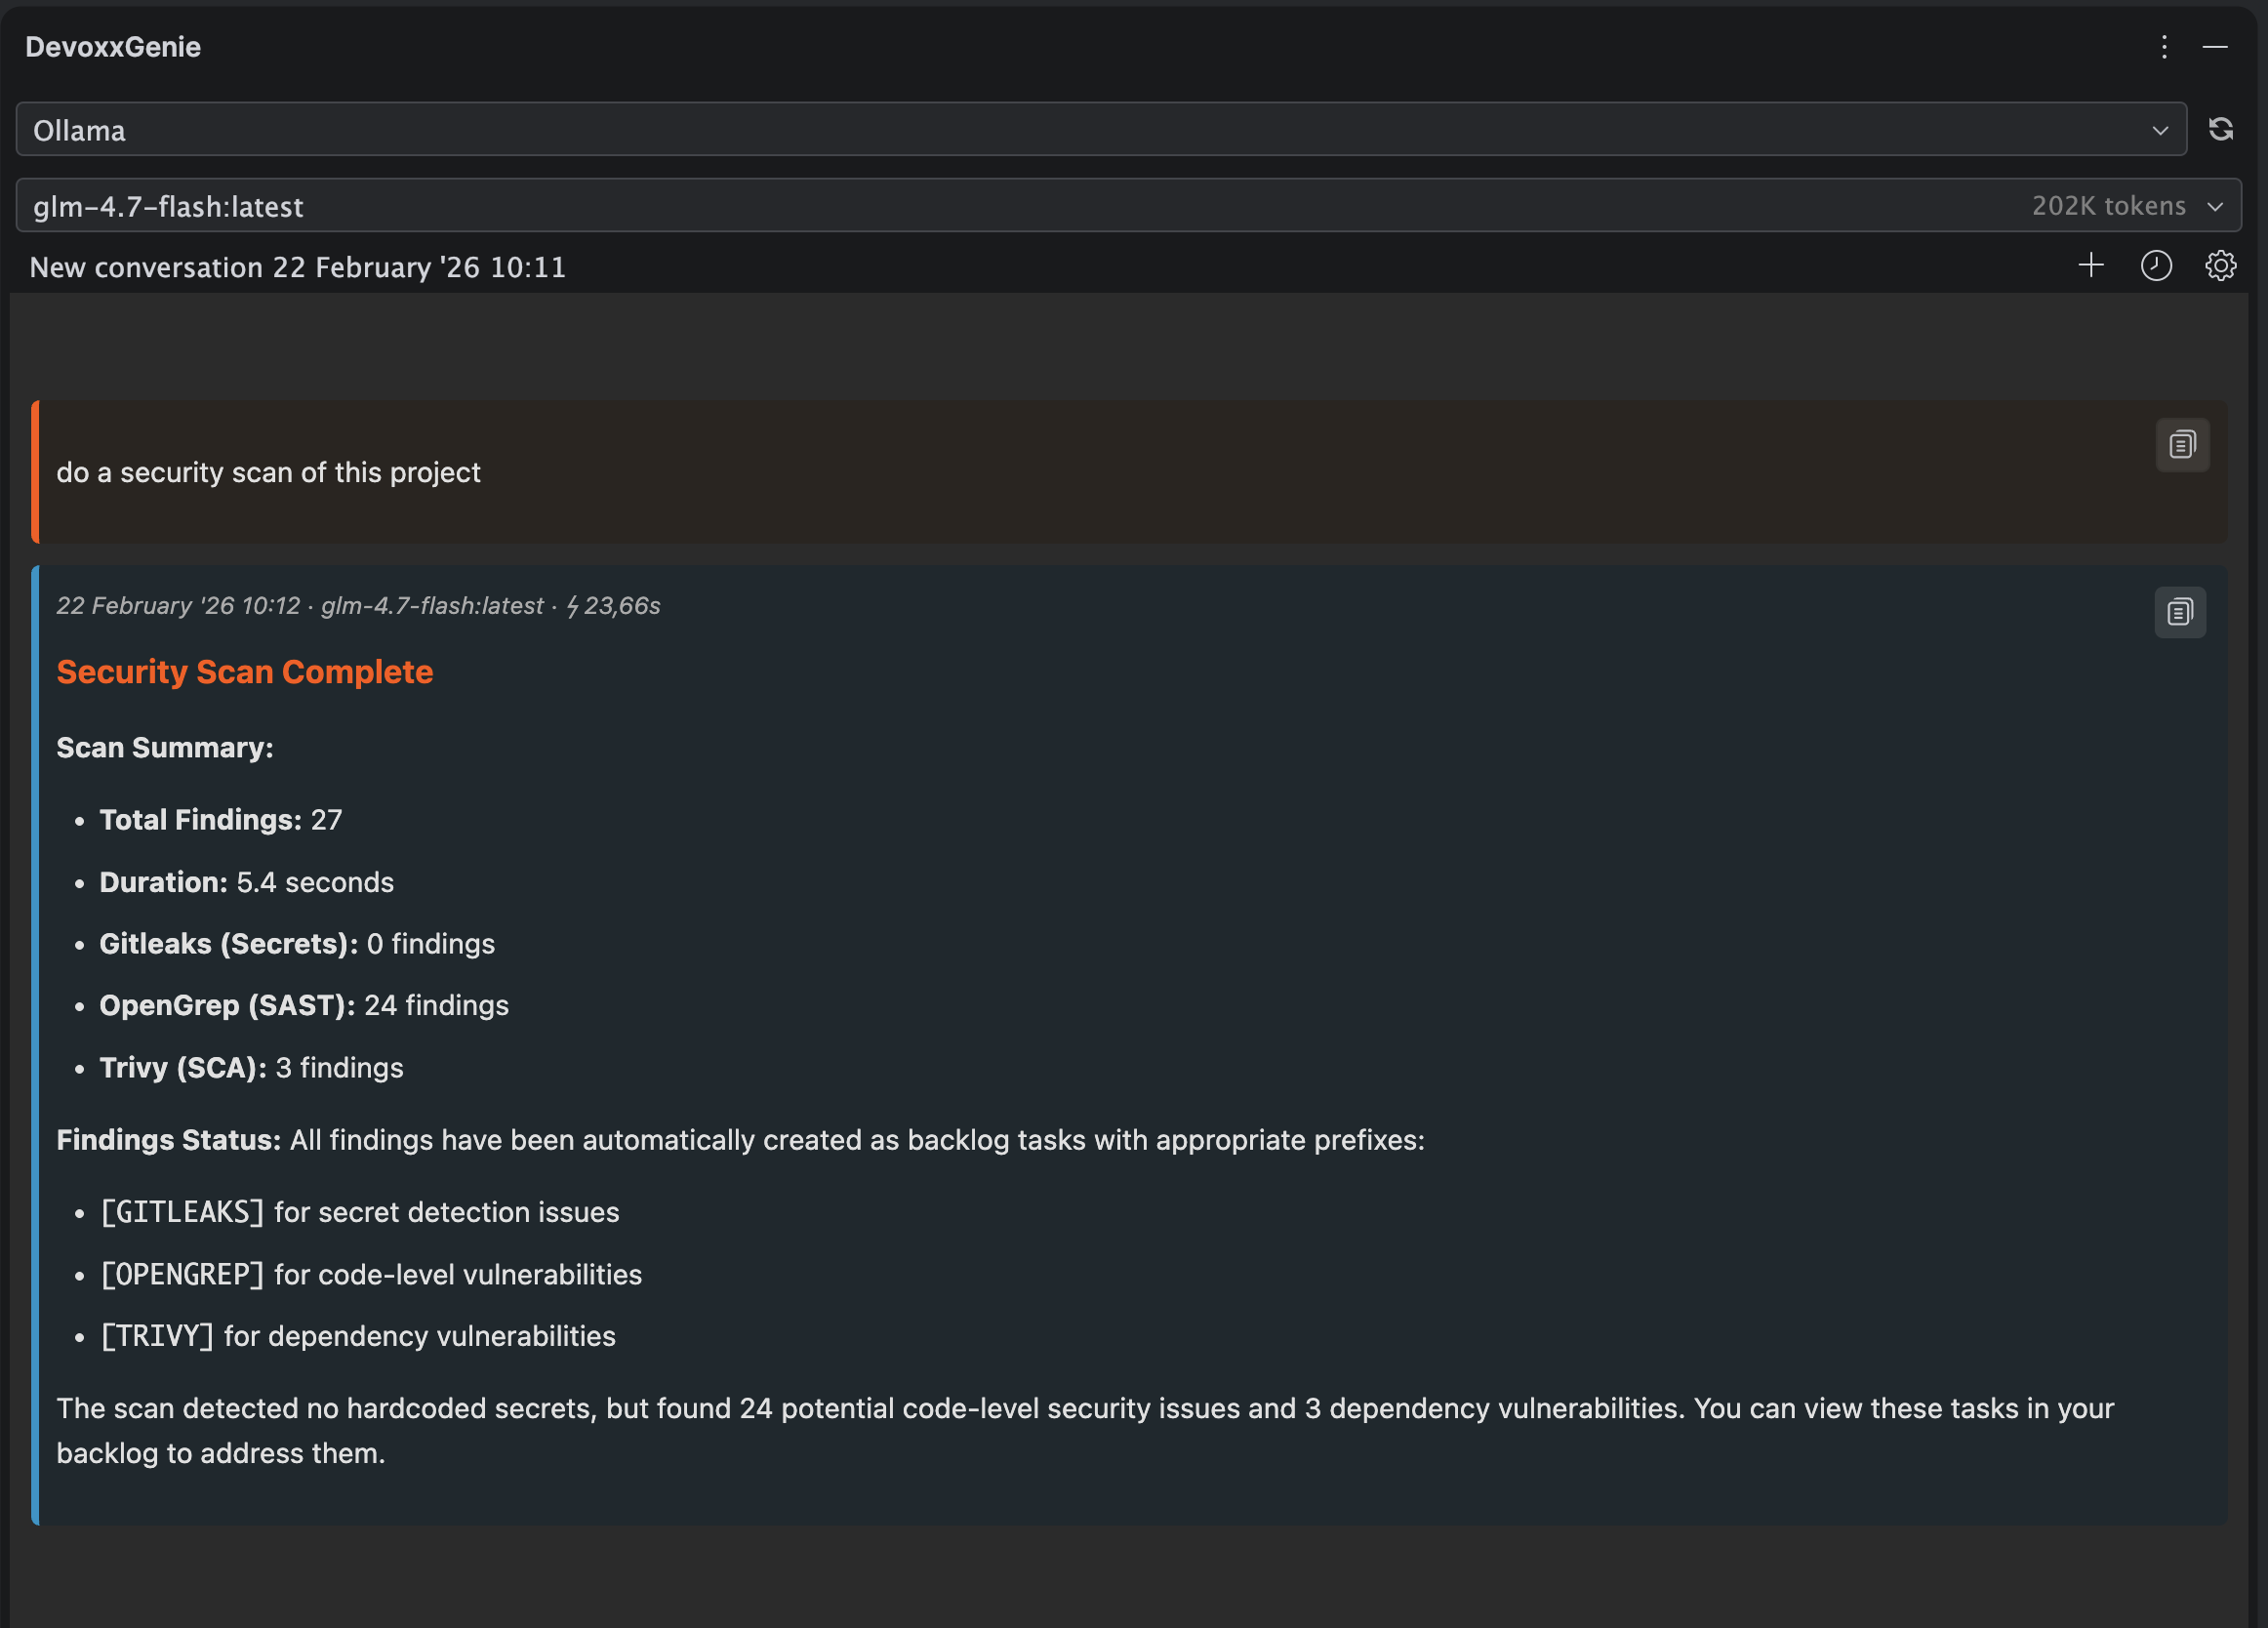
- "Run a full security scan and create backlog tasks for everything you find."
Backlog Integration
When Create Spec Tasks from findings is enabled, every finding from a completed scan is automatically added to your Spec Browser as a backlog task:
- Title: prefixed with
[GITLEAKS],[OPENGREP]or[TRIVY]so findings are easy to filter. - Priority: mapped from the scanner's severity (
high,medium,low). - Labels:
security, the scanner name and the severity level. - Description: includes the rule ID, affected file/package and remediation guidance.
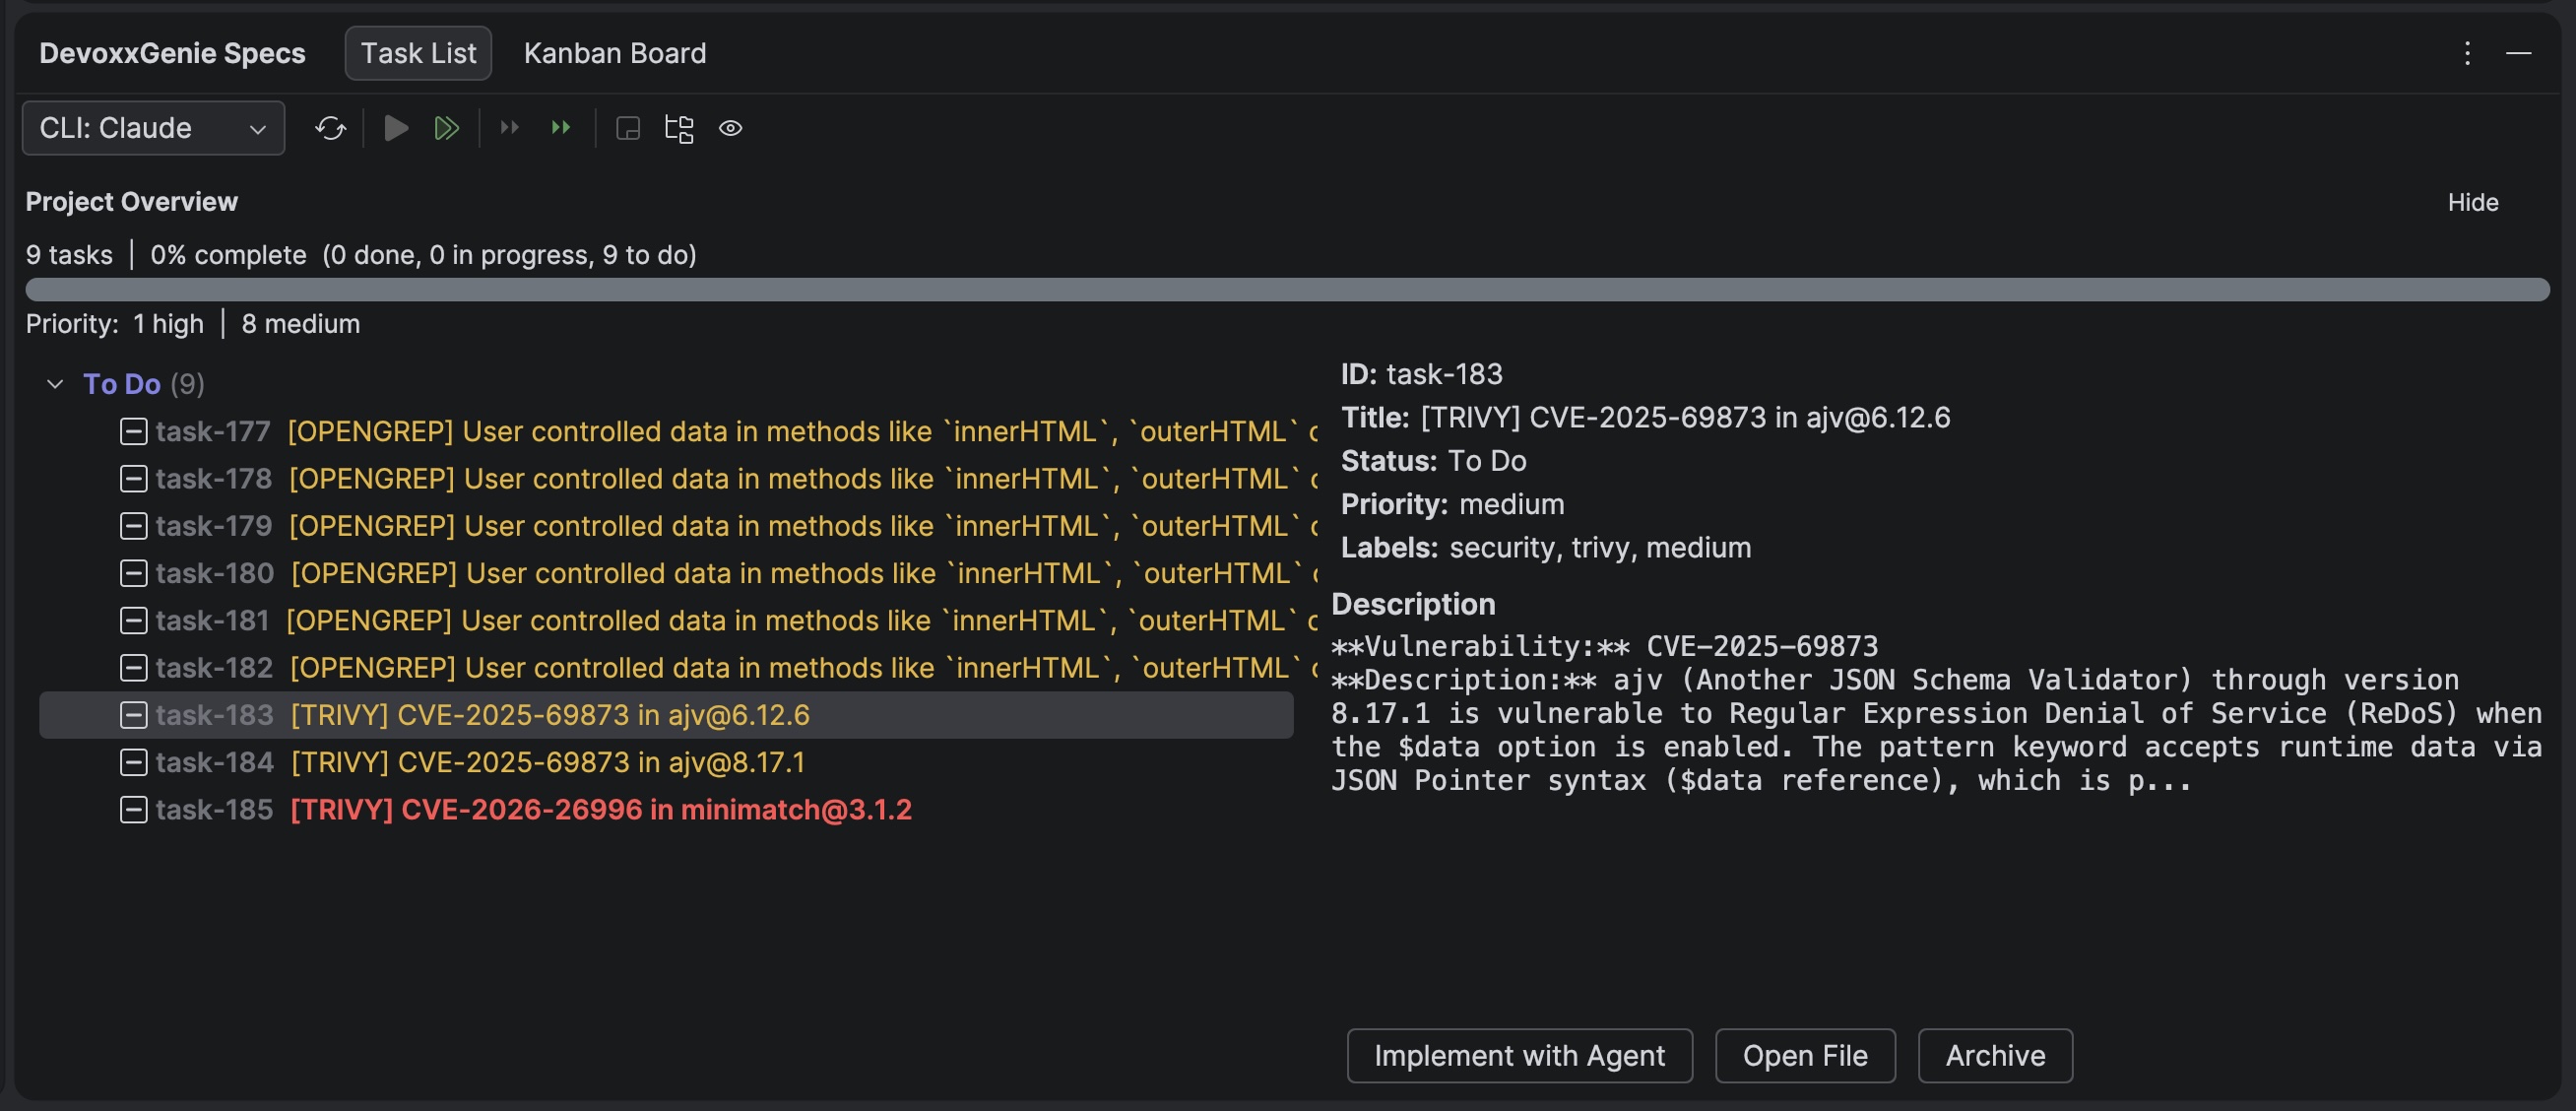
Duplicate findings are detected by title — if a task with the same title already exists in the backlog it is skipped, so re-running a scan will not create duplicate tasks.
Combine Security Scanning with the Spec-Driven Development agent loop to automatically plan and implement remediations for every finding.
Troubleshooting
The Test button shows ✗ Not found
The binary is not on your system PATH and no custom path is set. Either:
- Install the scanner (see Installation Guide above), or
- Click the browse button (📁) next to the path field and select the executable manually.
OpenGrep shows execvp pyopengrep: No such file or directory
The pyopengrep companion binary is not in the same directory as opengrep-cli, or it is not on PATH. Make sure both binaries were installed together (e.g., both via brew install opengrep).
Trivy shows Operation not permitted
On macOS, binaries downloaded manually (not via Homebrew) may have the quarantine attribute set. Remove it with:
xattr -d com.apple.quarantine /path/to/trivy
Or install via Homebrew to get a pre-notarised binary.
The agent says tasks were created but the setting is disabled
Reload the plugin settings (close and reopen the Settings dialog, then click Apply). If the issue persists, restart the IDE.
Scans run but no tasks appear in the Spec Browser
Check that Create Spec Tasks from findings is enabled in Settings → Security Scanning, and that your project has a valid Backlog.md workspace (see Spec-Driven Development).