MCP Support
Model Context Protocol (MCP) is one of the most powerful features in DevoxxGenie. It enables agent-like capabilities, allowing the LLM to access external tools and services to provide more comprehensive and accurate responses.
What is MCP?
Model Context Protocol (MCP) is a protocol for integrating external capabilities into LLM interactions:
- Access External Information: Query real-time data, APIs, and services
- Perform Actions: Execute tasks outside of the chat environment
- Use Specialized Tools: Leverage purpose-built tools for specific domains
In DevoxxGenie, MCP support enables full agentic AI capabilities where the LLM can actively assist with complex development tasks by calling tools, reading files, querying databases, and more.
How It Works
When you use MCP in DevoxxGenie:
- The LLM recognizes when external tools would be helpful
- It calls the appropriate MCP tool with the necessary parameters
- The tool executes and returns results to the LLM
- The LLM incorporates the results into its response
Common MCP server categories include:
- Filesystem: Interact with files and directories
- Database: Query databases directly
- API: Make API calls to external services
- Browser: Web browsing and scraping
- Custom Tools: Domain-specific tools tailored to your workflow
MCP Marketplace
DevoxxGenie includes a built-in MCP Marketplace that lets you browse, search, and install MCP servers directly from the settings UI.
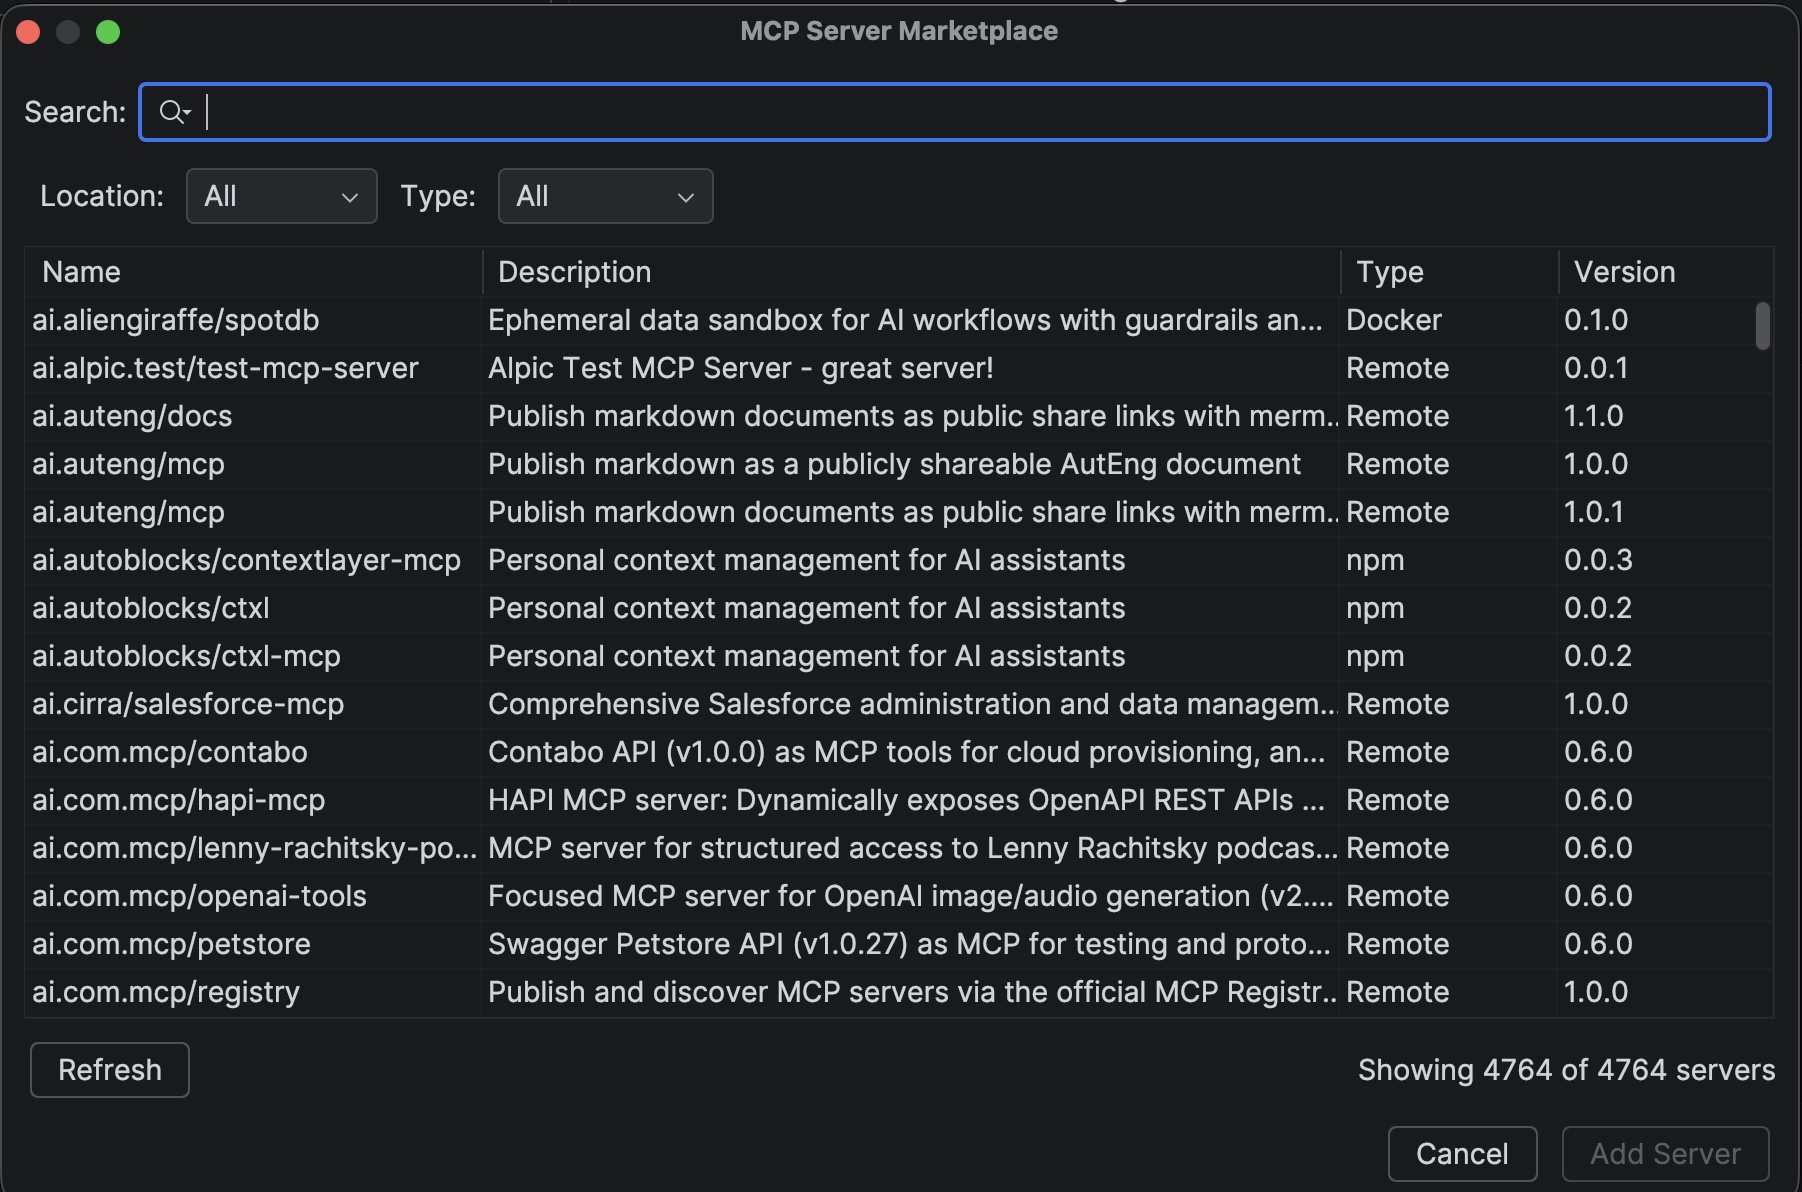
Browsing the Marketplace
- Open Settings > Tools > DevoxxGenie > MCP
- Click the Browse Marketplace button
- Browse or search for servers by name or keyword
- Click a server to see its details and available tools
- Click Install to add it to your configuration
The Marketplace pulls from the official MCP server registry and supports filtering by server type (npm, Docker, remote).
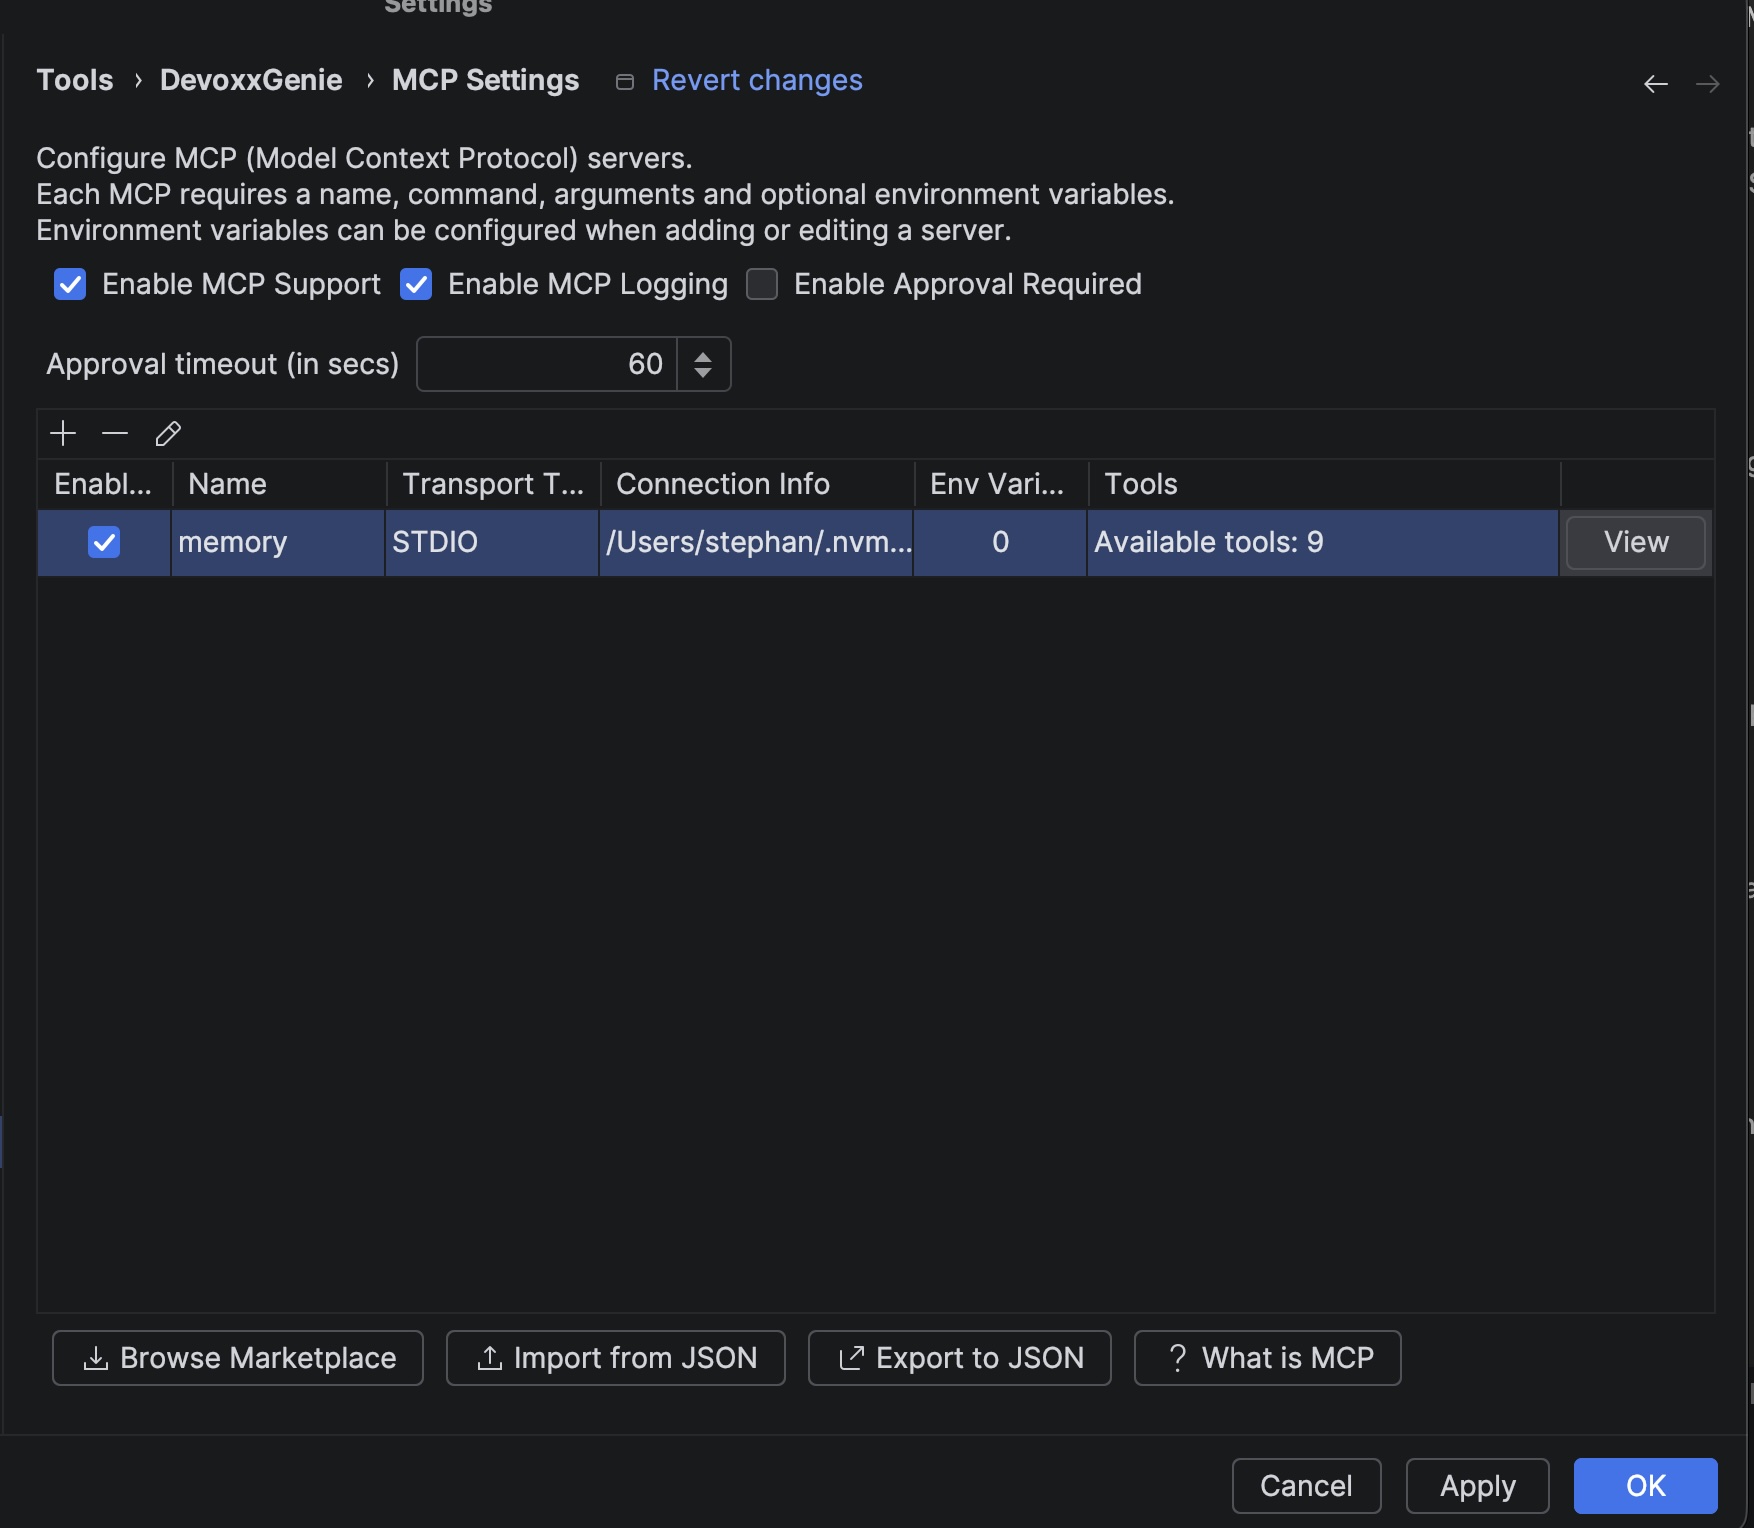
Setting Up MCP
Enabling MCP
- Open Settings > Tools > DevoxxGenie > MCP
- Check Enable MCP Support
- Add MCP servers via the Marketplace or manually
Transport Types
DevoxxGenie supports three MCP transport types:
| Transport | Description | Use Case |
|---|---|---|
| STDIO | Communicates via standard input/output with a local process | npm packages, Docker containers, local scripts |
| HTTP SSE | HTTP with Server-Sent Events for streaming | Remote servers with streaming support |
| HTTP | Standard HTTP requests | Simple remote servers |
Adding a Server Manually
- Click the + (Add) button in the MCP settings
- Choose a transport type
- For STDIO servers: enter the command, arguments, and optional environment variables
- For HTTP/HTTP SSE servers: enter the server URL and optional custom headers
- Click OK
Importing and Exporting Configuration
DevoxxGenie supports importing and exporting MCP server configurations in JSON format. This is useful for:
- Sharing configurations with your team
- Backing up your MCP setup
- Migrating between machines
- Using configurations from other MCP-compatible tools
Import from JSON
- Click the Import from JSON button in the MCP settings
- Select a JSON file containing MCP server configurations
- Choose whether to Replace existing servers or Merge with them
- The servers will be added to your configuration
Export to JSON
- Click the Export to JSON button in the MCP settings
- Choose whether to include DevoxxGenie-specific extensions (transport type, enabled status, headers)
- Select a location and filename for the export
- The configuration will be saved in Anthropic standard format
JSON Format
The import/export follows the Anthropic/Claude Desktop standard format:
{
  "mcpServers": {
    "server-name": {
      "command": "npx",
      "args": ["-y", "@modelcontextprotocol/server-filesystem"],
      "env": {
        "API_KEY": "value"
      }
    }
  }
}
DevoxxGenie also supports extensions for transport type (stdio, http, http-sse), enabled status, custom headers, and URLs for HTTP transports.
Custom HTTP Headers
For HTTP and HTTP SSE transport types, you can configure custom HTTP headers. This is useful for authenticated MCP servers that require API keys or bearer tokens:
Authorization: Bearer your-api-key
X-Custom-Header: value
Environment Variables
STDIO servers often need environment variables (e.g., API keys). You can configure these per server in the MCP settings dialog.
Human-in-the-Loop Approval
DevoxxGenie supports a configurable approval workflow for MCP tool executions. When enabled, you'll be prompted to approve or deny each tool call before it runs.
Enabling Approval
- In MCP Settings, check Enable Approval Required
- Set the Approval Timeout (default: 60 seconds)
When the LLM tries to call an MCP tool, a dialog appears showing:
- The tool name
- The arguments being passed
You can Approve or Deny the execution. If the timeout expires without a response, the call is denied by default.
This feature is recommended when using MCP servers that can modify files, send messages, or perform other side-effect actions.
Using MCP in Conversations
When MCP is configured, the available tools are shown in the DevoxxGenie interface. To use them:
- Start a conversation with your LLM provider
- Ask questions or give instructions that might require external tools
- The LLM will automatically use the available MCP tools when appropriate
For example, with a Filesystem MCP server enabled:
Can you list all Java files in the src/main directory that implement the Observer pattern?
MCP Debugging
DevoxxGenie includes a debugging panel for MCP requests and responses:
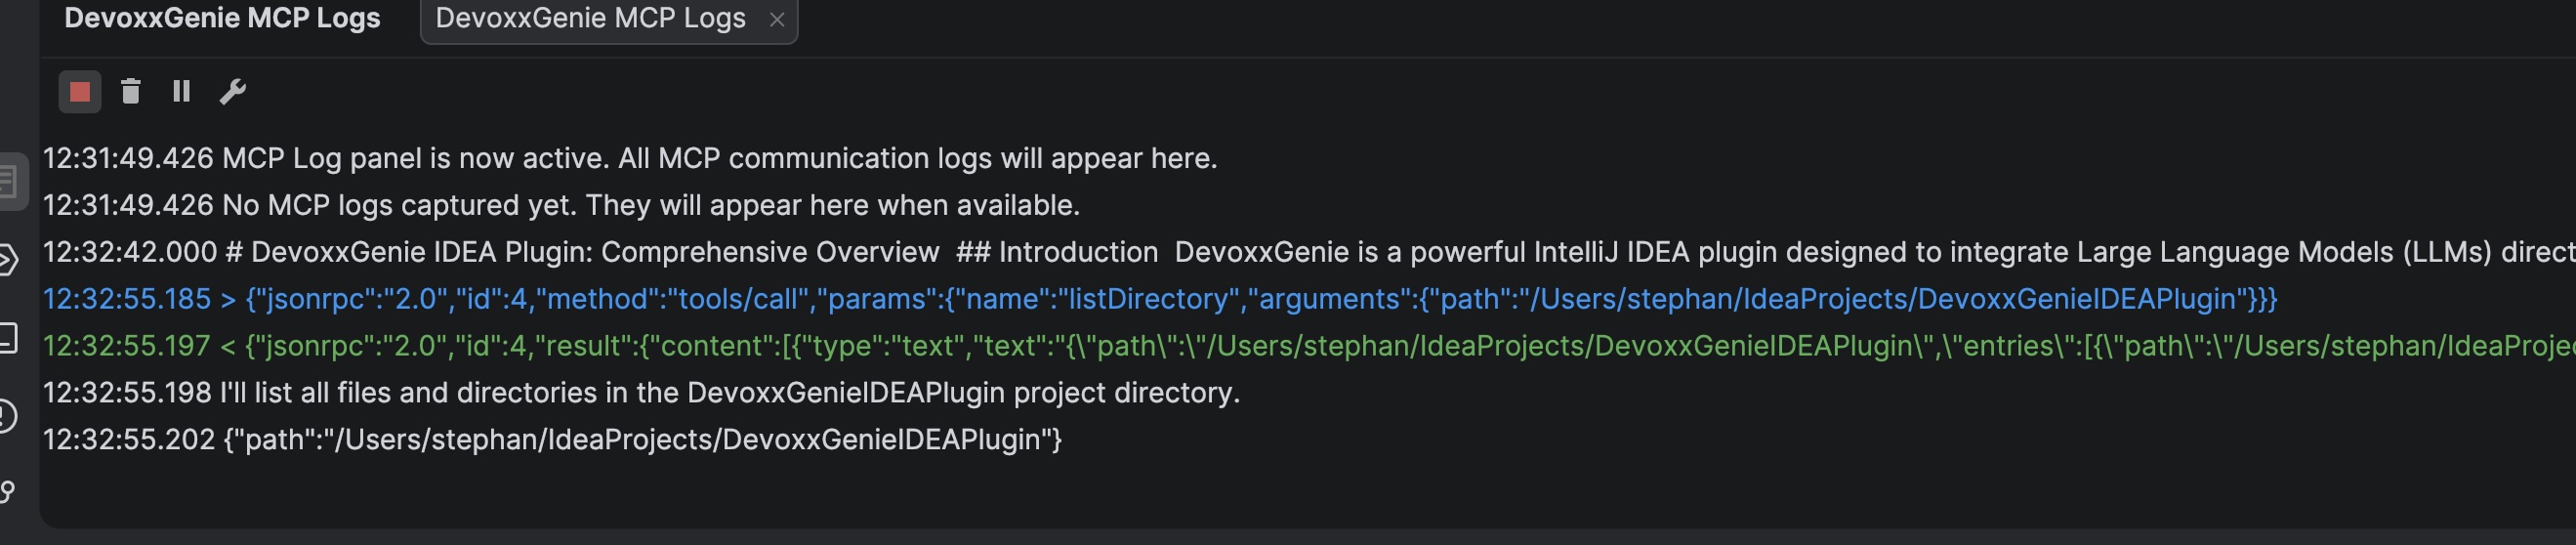
- Enable MCP Logging in the MCP settings
- Open the DevoxxGenieMCPLogs tool window from the bottom panel
- Observe the requests sent to and responses received from MCP servers
- Double-click any log entry to view the full JSON formatted output in a dialog
- Use this information to troubleshoot issues or understand how the LLM is using the tools
Viewing Available Tools
Each MCP server exposes a set of tools. To see what tools a server provides:
- In the MCP settings table, click the View button for a server
- A dialog shows a table of tool names and their descriptions
- The tools column in the main table also shows a summary count
Per-Tool Enable/Disable
You can selectively enable or disable individual tools exposed by each MCP server. This gives you fine-grained control over which capabilities the LLM can use during conversations.
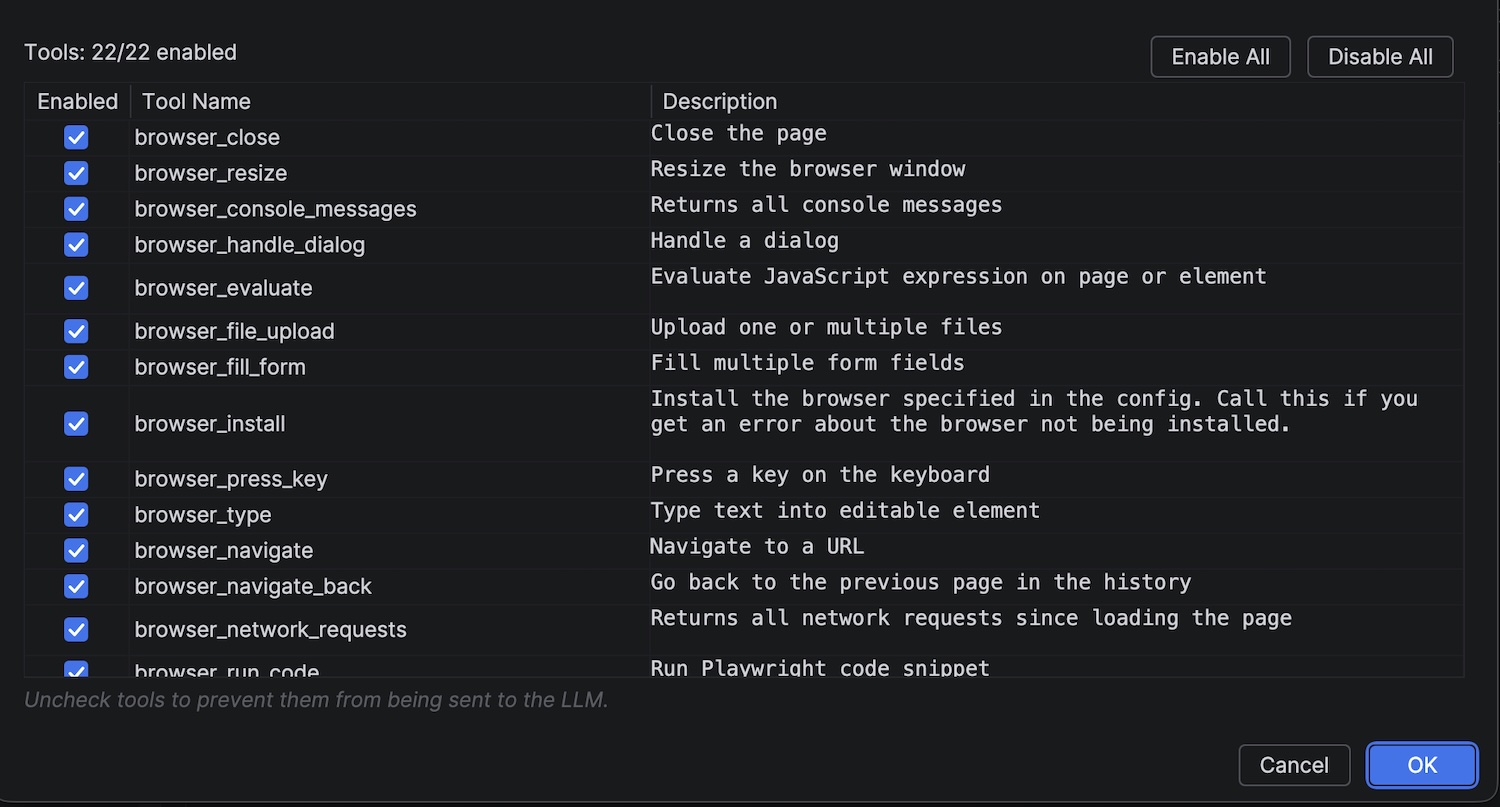
How to Use
- In the MCP settings table, click the View button for a server
- Each tool is listed with a checkbox next to its name
- Uncheck a tool to disable it — the LLM will no longer be able to call it
- Check a tool to re-enable it
Use Cases
- Security: Disable write or delete tools on a filesystem server to make it read-only
- Focus: Disable tools that aren't relevant to your current task to reduce noise
- Testing: Temporarily disable a tool to see how the LLM behaves without it
- Cost control: Disable expensive API-calling tools when not needed
Troubleshooting
Connection Problems
If you're having trouble connecting to an MCP server:
- Verify the server is running and accessible
- Check the URL or command in the MCP settings
- Ensure any required environment variables are set correctly
- Check the MCP logs for error messages
Tool Usage Issues
If the LLM isn't using the MCP tools as expected:
- Be more explicit in your instructions
- Check if the tools are showing up in the interface
- Verify the LLM provider you're using supports tool calling
- Review the MCP logs to see if there are any issues with the tool invocation
STDIO Servers Not Starting
- Verify the command is installed and available in your PATH (e.g.,
npx,docker) - Check that all required arguments are configured
- Look at MCP logs for startup errors