Skills
Skills are self-describing capabilities loaded from SKILL.md files on disk. Unlike Commands (which are user-typed slash macros expanded before the LLM sees them), Skills are activated by the LLM itself, mid-conversation, via an activate_skill tool call when the model decides a skill is relevant to the user's request.
This makes Skills a portable, file-based way to teach the agent reusable workflows — refactoring guides, code-review checklists, framework-specific recipes, deployment procedures, etc. — without modifying the system prompt or building MCP servers.
.claude/skills and .agents/skillsDevoxxGenie discovers skills from the same directories that Claude Code and other .agents-aware tools use, so the same SKILL.md files work across all of these tools.
Requirements
Skills are only active when:
- Agent Mode is enabled — go to Settings → Tools → DevoxxGenie → Agent and tick Enable Agent Mode. If Agent Mode is off, no
activate_skilltool is exposed to the LLM and skills are inert. - You are using a tool-capable LLM — Skills are delivered as a tool call (
activate_skill), so the selected model must support function/tool calling. Most modern cloud models qualify (OpenAI GPT-4o/4.1, Anthropic Claude 3.5+, Google Gemini 1.5+, Mistral, Grok, etc.); for local models pick one advertised as supporting tool use (e.g. Qwen2.5-Coder, Llama 3.1+, GLM-4).
How Skills Work
- On every chat request, DevoxxGenie scans the six skill directories and builds a list of available skills.
- A short index of
(name → description)is injected into the system prompt so the LLM knows what skills exist. - When the LLM decides a skill is relevant, it calls the
activate_skilltool with the skill name. DevoxxGenie streams the full body of thatSKILL.mdback into the conversation. - The LLM then continues the conversation using the skill's instructions and any resources it references.
The user never types anything special — discovery and activation happen entirely on the model's side.
Skill File Format
A skill lives inside a named subdirectory and consists of a single SKILL.md file at its root:
<skill-name>/
└── SKILL.md
The file uses YAML frontmatter for metadata followed by Markdown for the instructions:
---
name: refactor-helper
description: Guides a safe, step-by-step refactoring workflow with tests
---

# Refactor Helper

When the user asks for a refactor:

1. Read the target file and its references.
2. Sketch the refactor as a diff before applying it.
3. Run the project's tests after each step.
4. Stop and report if any test fails.

## Resources
- See `checklist.md` in this directory for the full checklist.
| Field | Required | Description |
|---|---|---|
name | Yes | Unique identifier the LLM uses in activate_skill. Should match the directory name. |
description | Yes | One-line summary shown to the LLM in the skill index. Make it action-oriented. |
The body below the frontmatter can be any Markdown — instructions, checklists, examples, links to sibling files in the skill directory.
Where to Put Skill Files
DevoxxGenie scans six directories for skills. They are listed below in increasing priority order — on a name collision, the higher-priority source wins:
| Priority | Directory | Scope |
|---|---|---|
| 1 (lowest) | ~/.agents/skills/<name>/ | User — shared with .agents-aware tools |
| 2 | ~/.claude/skills/<name>/ | User — shared with Claude Code |
| 3 | ~/.devoxxgenie/skills/<name>/ | User — DevoxxGenie only |
| 4 | <project>/.agents/skills/<name>/ | Project — shared with .agents-aware tools |
| 5 | <project>/.claude/skills/<name>/ | Project — shared with Claude Code |
| 6 (highest) | <project>/.devoxxgenie/skills/<name>/ | Project — DevoxxGenie only |
Two general rules apply to name collisions:
- Project beats user — a skill defined inside the project wins over one with the same name in your home directory.
.devoxxgeniebeats.claudebeats.agents— within the same scope, the DevoxxGenie-specific directory has the highest priority, then.claude, then.agents.
This layering lets you keep a shared library of skills in ~/.claude/skills/ (reused across Claude Code and DevoxxGenie) and selectively override a single skill per-project from .devoxxgenie/skills/.
Managing Skills — Settings UI
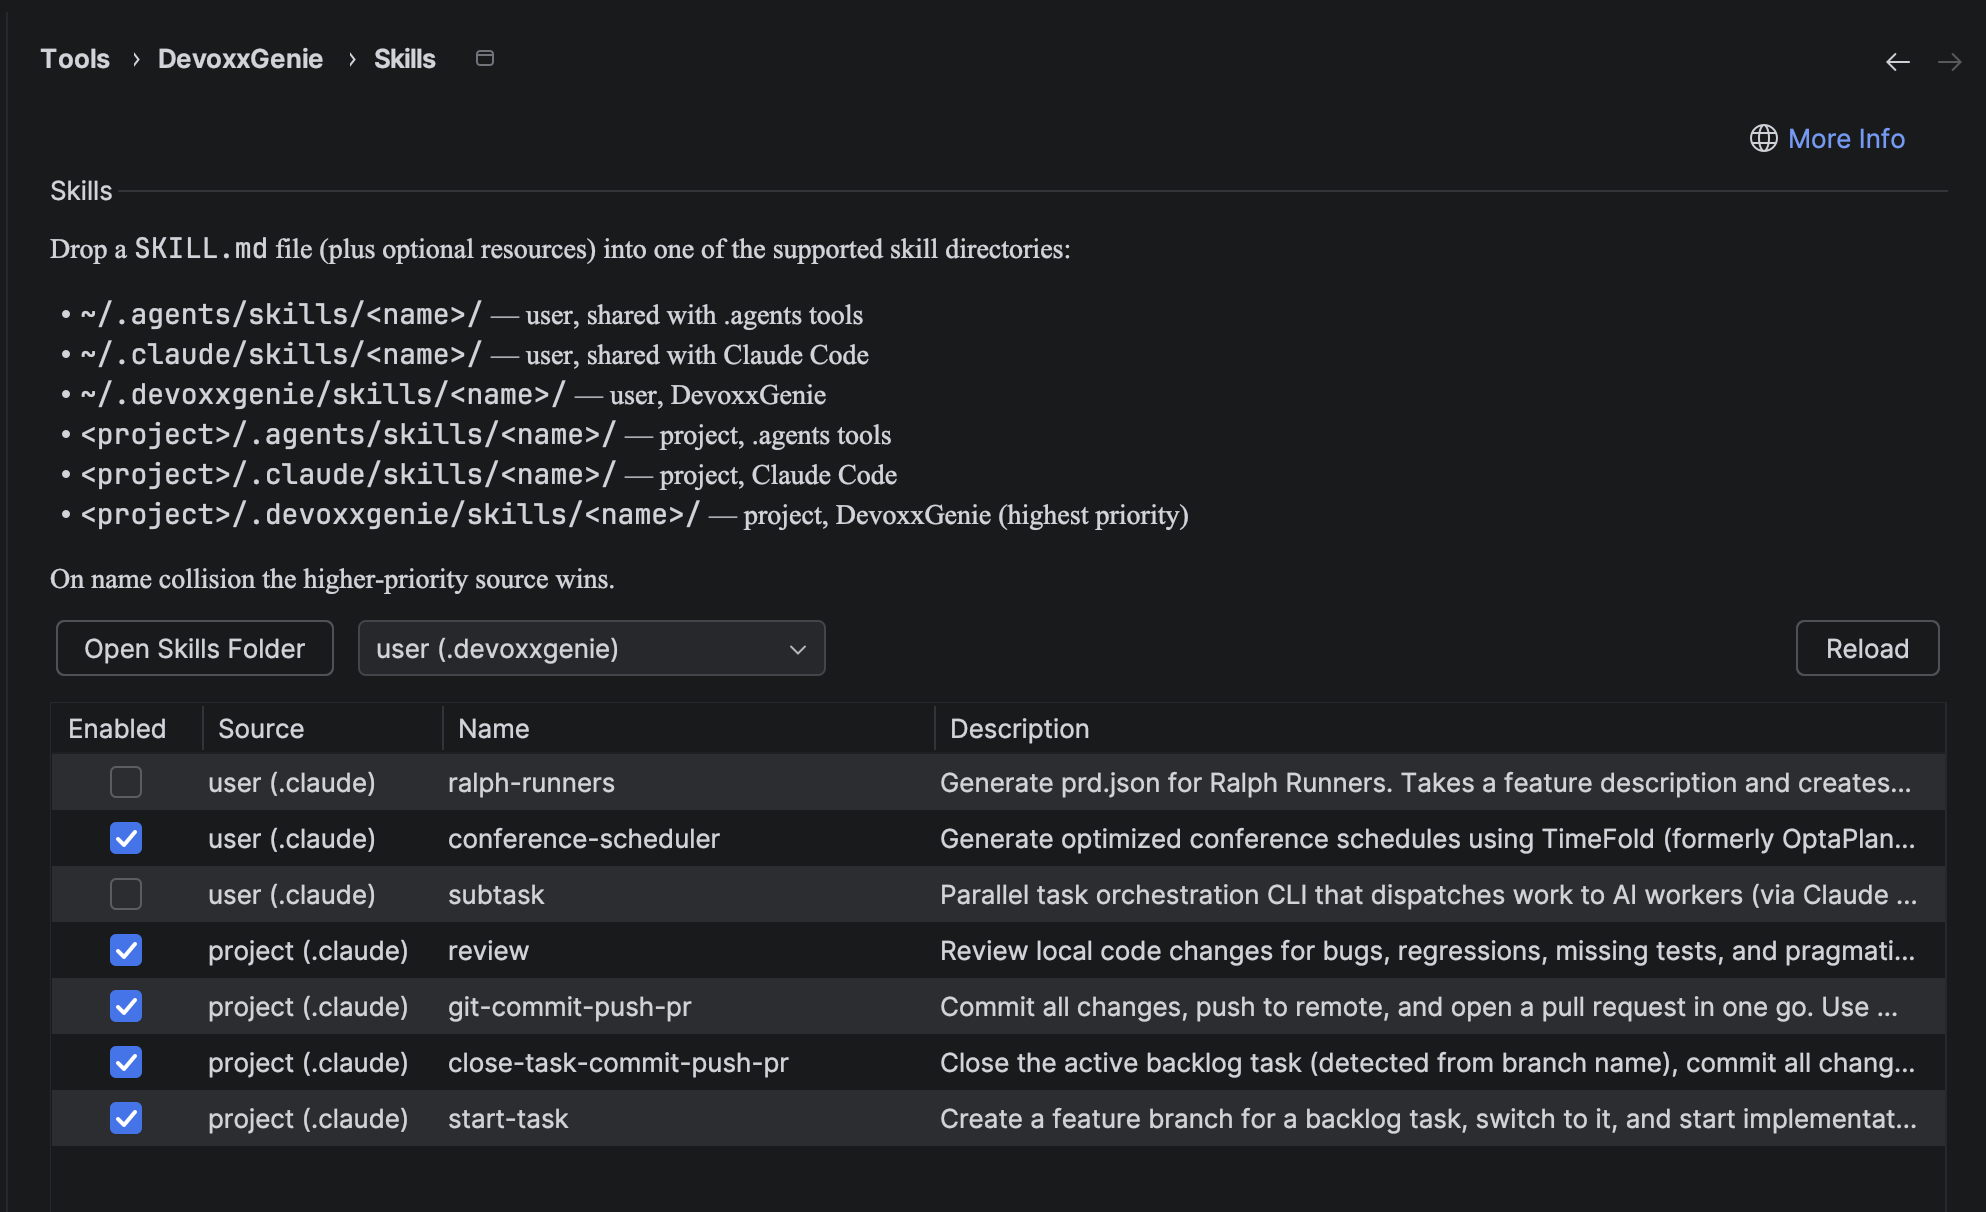
Open Settings → Tools → DevoxxGenie → Skills. The page shows:
- Skills table — every detected skill across all six directories, with columns for Enabled, Source (e.g. project (.claude)), Name, and Description.
- Open Skills Folder dropdown + button — pick any of the six directories and click the button to open it in your file manager. The directory is auto-created if it doesn't exist yet, so this is the fastest way to start writing a new skill.
- Reload button — re-scans all six directories without restarting the IDE. Use this after editing a
SKILL.mdoutside the settings dialog. - Enabled checkbox — untick to keep the file on disk but hide the skill from the LLM. Disabled skills are remembered across IDE restarts.
When more than one source defines the same skill name, only the highest-priority one is listed (the others are skipped with a warning in the IDE log).
Creating Your First Skill
-
Open Settings → Tools → DevoxxGenie → Skills.
-
In the Open Skills Folder dropdown choose, for example, project (.devoxxgenie) and click the button — your file manager opens
<project>/.devoxxgenie/skills/. -
Create a new directory next to that path, e.g.
commit-message-writer/. -
Inside it create
SKILL.md:---name: commit-message-writerdescription: Writes a Conventional Commits message based on the current staged diff---When asked to generate a commit message:- Run `git diff --cached` to read the staged changes.- Summarise them in the Conventional Commits format `type(scope): subject`.- Body lines should explain *why*, not *what*.- Keep the subject ≤ 72 chars. -
Back in the Settings dialog, click Reload. Your skill appears in the table.
-
In the chat panel, enable Agent Mode and ask: "Write me a commit message for my staged changes." The model will call
activate_skill("commit-message-writer")and follow the instructions you wrote.
Commands vs. Skills
| Commands | Skills | |
|---|---|---|
| Invoked by | User types /name args | LLM calls activate_skill(name) |
| Timing | Pre-LLM, before the request is sent | Mid-conversation, LLM-driven |
| Requires Agent mode | No | Yes |
| Storage | IDE Settings (XML) | SKILL.md files on disk |
| Portable | DevoxxGenie only | Shared with Claude Code & .agents tools |
| Best for | Quick repeatable prompt templates | Reusable agent capabilities and workflows |
Tips
- Write descriptions like tool descriptions. The LLM picks a skill based on its one-line description, so make it concrete and action-oriented ("Guides a safe refactor workflow" beats "Refactoring stuff").
- Keep the body actionable. A skill is most useful as a numbered checklist or playbook the model can follow step-by-step.
- Reference sibling files. You can ship resources next to
SKILL.md(e.g.checklist.md,template.json) and tell the LLM to read them — Agent Mode'sread_filetool can pull them in on demand. - Use project-level
.devoxxgenie/skills/for team-specific recipes. Commit them to your repo so every team member with DevoxxGenie installed gets the same agent behaviour. - Disable rather than delete. When experimenting, untick Enabled in the Settings dialog instead of removing the
SKILL.mdfile.
Related Features
- Commands — user-typed slash commands (the rename of the former "Custom Prompts" / "Skills" feature)
- Agent Mode — required for Skills to be active
- MCP Support — another extension mechanism, geared at external tool servers rather than disk-based instructions
- Chat Interface — where Skills are surfaced in conversation